Our younger son is learning about rivers this week. Monday we talked about how a river often begins in a lake or some body of water on a mountain and how the water carves into the dirt to create the river. I wanted to show him this idea in a fun, memorable way. So I searched Pinterest and Google but only found an idea for making a river to play in in the back yard. It looks like a fun idea, but we don’t have a slope, so it wouldn’t work and it didn’t demonstrate the idea of the water eroding it’s place. So I decided to try out an idea I had and it actually worked!!! I was so excited that, I jumped up and down clapping my hands!
We put a disposable bowl (because I didn’t want to have to clean a regular bowl) upside down in a casserole dish. I used some leftover garden gravel to keep it in place.

Then we put gardening soil over it. It’s hard to tell in this picture, but I made a small impression in the dirt to be our lake. It’s main purpose was to give him a place to aim the water on the next step. I used what I had on hand which was more like a mulch. This would work better, I think, with a finer soil or dirt. Or, if you begin it early enough, you could plant some seeds in the soil, wait for them to grow some roots for holding the dirt more in place, then continue the project.

Then we used flour to put some “snow” on the area. I did this because I wanted him to be able to see the river. I figured it would be hard to see the small stream of water on the dark soil. He loved putting the snow on.
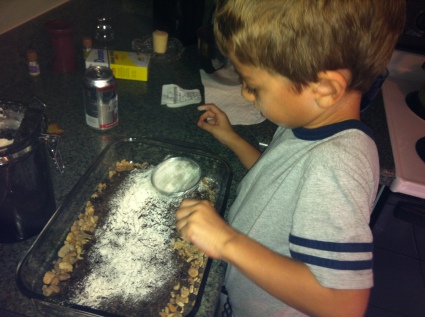
I had prepared some water dyed blue ahead of time. I gave him a measuring cup with the water and told him to go super slowly. He accidentally dumped it and we had to rebuild the mountainside, so I dug out a water bottle with one of those tops that you pull up to get a drink out. He was able to gently squeeze it to make a lake at the top of the mountain.

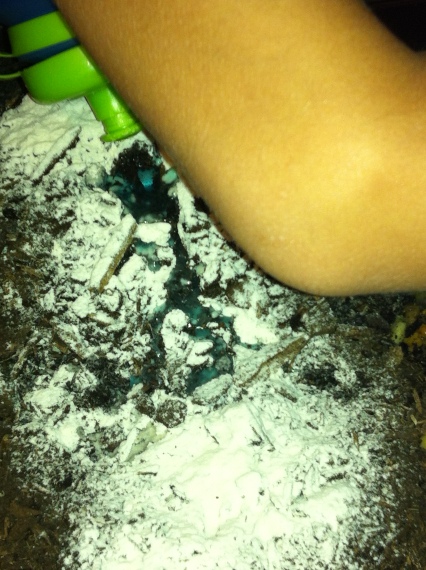
You can see the river flowing in that picture, but I got a close up, too.
If I were to do it again (which he begged me to do, but we didn’t have time to recreate it), I would use thicker soil as I mentioned above. I think that it would hold water better so that the “river” wouldn’t disappear quite so quickly. I would also use more soil so a little erosion wouldn’t cause the entire “mountain” to crumble. I would also make a thicker layer of flour so the river would be more visible. All in all, it was a quick, simple, and inexpensive way to watch a river carve it’s path and I’m thrilled that we saw success!

Leave a comment